Guest Post: Growing an Indoor Micro Garden
If you’ve followed me for some time now, then you probably know that I’m super passionate about gardening. It’s quickly become my most enjoyable pastime, relaxation therapy and a big part of my life. Most importantly, for the planet it’s an important way to lessen our carbon foot print. It saves you money and what better food could you possibly eat than that which you nurtured and cared for with all the organic love in the world.
So, today I’m happy to share a guest post by Dane O’Leary from Modernize.com explaining how to Grow Indoor Micro Garden. If you’re limited on outdoor space or the weather isn’t ideal for growing an outside garden, then why not grow indoors? Here are some great tips to help you get started!
With winter slowly but surely coming to a close, it’s almost time to head outdoors and get those vegetable gardens started. However, growing indoor micro gardens is a great way to have tasty greens all year round, even if you don’t have the outdoor space for a garden. You needn’t have a magical green thumb to be able to grow and harvest microgreens and a variety of other organic morsels indoors. Not only is it easy, it’s also a lot of fun and can even be great therapy to combat those winter blues. Here’s what you need to know about indoor micro gardening so you can enjoy lush greens throughout every season.

Via Schneider Peeps
What Can I Grow in My Indoor Micro Garden?
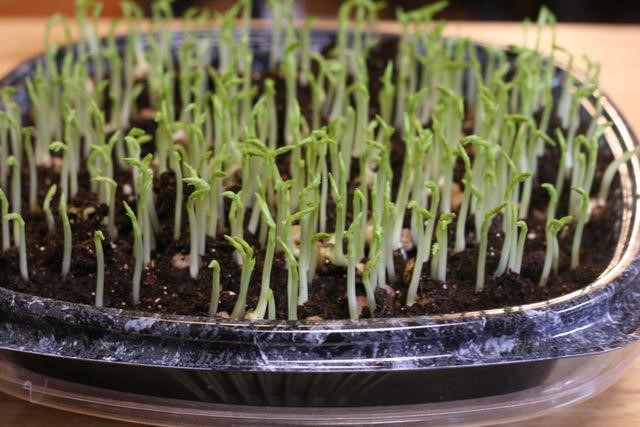
There are many things that can flourish in an indoor micro garden. Anything that doesn’t require a ton of root space could grow well indoors, but one of the most common indoor crops is referred to as microgreens. These lettuce and mustard greens are popular among indoor micro-gardeners because they grow quickly and are harvested after only a few weeks when they get to be an inch or so tall. Microgreens are very tender and tangy, similar to baby greens but younger. Another reason they’re popular is because they can be harvested frequently throughout the winter months, making them one of the most fruitful crops you can grow indoors. They can also thrive with minimal sunlight, which makes them very low-maintenance and great for beginners.
In fact, lettuce-type greens are very popular for growing indoors. There are many ready-mixed greens that you can find in most stores that will give you a variety of greens with different flavors that you can try. Mustards, cresses, and arugula are also popular lettuce greens for indoor gardens and are relatively low-maintenance.
If you’re looking for something with a little more personality, bok choy is easy to grow indoors as well. The crunchy, delicious little heads of bok choy mature in about 30 days and are great for soups, stir fries, or even raw in salads. You can also grow carrots — yes, carrots! — indoors; round romeo baby carrots look like little orange grape tomatoes, but taste just like the larger baby carrots you can buy in supermarkets and grow relatively quickly. Basil is another indoor favorite, as are most other herbs, and is notoriously easy to grow. In fact, basil can quickly grown into a large basil bush if left to its own devices, but you could very well grow enough for a pesto.

How Do I Start an Indoor Micro Garden?
To start your indoor micro garden, you will need soilless seed-starting potting mix, lighting (if your indoor garden won’t or can’t have a source of natural light), the containers you’re going to use — keep in mind you can either use small, individual-sized containers for each plant or use large containers for multiple plants — as well as your seeds, some vermiculite, and your plant labels.
Start by putting your soilless potting mix into a larger bucket, then adding some warm water, mixing and fluffing it to get it thoroughly moist. Fill your containers with the moist potting mix without packing it too tightly. For planting, gently drop the seeds on top of the soil, then generally you will press them about half an inch to an inch down into the soil with the tip of your pinky finger. Depth can vary depending on what you’re planting so it’s important to read the instructions on your seeds’ packets. Gently cover with loose soil and cover the soil with a thin, even layer of vermiculite, which will hold water and release it slowly, optimal for growing seedlings. Finally, label your seeds so that you know what will be growing where.
Once everything is planted, give everything a gentle shower, making sure that the vermiculite soaks up the majority of the water but isn’t washed away. You’ll need to continue watering so that the potting mix remains damn until the seeds begin to sprout, which is where the vermiculite is helpful; however, you don’t want the mix to be too wet as this could prevent the seeds from sprouting.
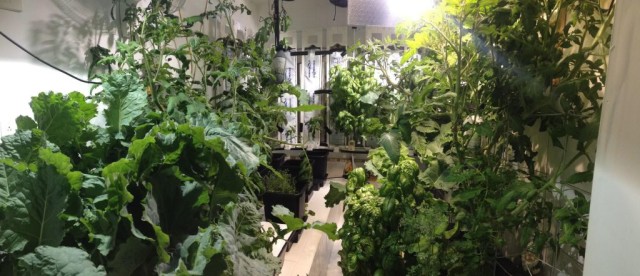
You should keep your new micro garden in an area that receives ample sunlight such as a windowsill. If yours will be a basement garden, you will need to set up lighting for your garden, either individual lights for each planter, larger hanging lights for the whole area, or some other option. Depending on the containers you used, you may need to sit them on some sort of drip tray to catch excess water. Another tip is to keep your seeds covered with plastic wrap until they begin to sprout as it will help to circulate moisture, promote humidity, maintain some warmth, and help with germination.
For more healthy living tips and tricks, head to Modernize.com.
Posted in Wellness and tagged with grow indoor micro garden, growing indoors, how to, vermiculite
1 Comments
Leave a Comment

About Me
Hi, I’m Christine, thanks for stopping by! As a fibromyalgia thriver (symptom-free for over 10 years now thanks to diet and lifestyle changes), it is my passion to share the healing power of food.
As an RN and Holistic Nutrition Practitioner, it is my desire to empower you to take charge of your life.
Let’s journey together to glowing health. Learn More
Your Health Transformation Starts Here!

Sign up to get FREE healthy lifestyle tips and recipes!
very useful blog thanks for all info.